Introduction
Buying your first telescope is probably going to be your most difficult decision as an amateur astronomer. And if you
find yourself enjoying the night sky through your first telescope it is most likely that through the course of time you will
acquire additional telescopes that will serve different purposes and further increase your enjoyment.
Some amateur astronomers enjoy the sophistication of their telescopes as much as they enjoy the night sky and this is
another reason for owning more than one telescope.
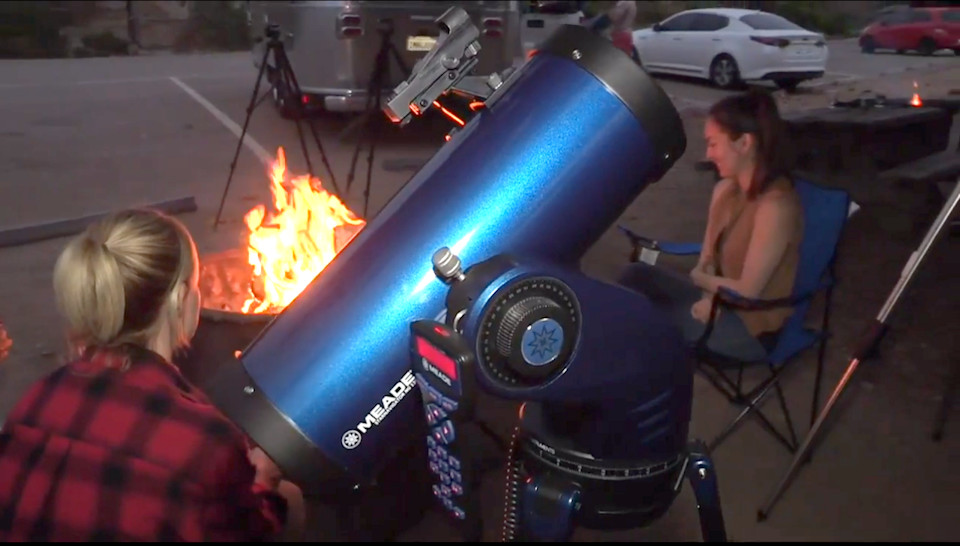
The StarNavigator NG telescopes are well suited as a first telescope.
While telescopes are the main type of instrument for observing the night sky binoculars are also popular as they are
affordable, easy to carry and at the same time they can reveal a lot about the night sky. Binoculars are also very useful
as a secondary instrument and can aid the astronomer in scanning the night sky for celestial objects of interest before
turning the telescope towards them. There are three main types of telescopes, refractors, Newtonian reflectors, and
catadioptrics.
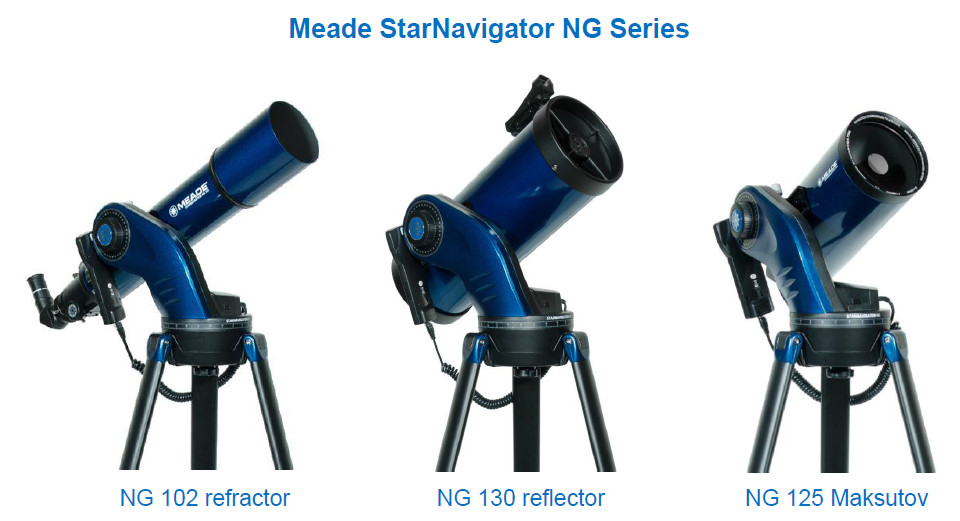
Meade StarNavigator NG telescopes.
In general refractors can be the most expensive to buy for the same aperture but are easier to set up than a Newtonian,
they hardly require any maintenance, and can provide sharp images of the stars and planets, especially true for
Apochromatic (APO) refractors. They are however increasingly difficult to handle at apertures above 125mm (5 inches)
due to their size and weight. Prices for good quality refractors start rising sharply at around 100mm (4 inches) apertures.
Refractor telescopes above 150mm (6 inches) in aperture are very difficult handle and transport, and require good quality
heavy mounts that can be rather expensive.
Newtonian telescopes are cheaper to buy than a refractor of similar aperture but in general image quality is not as good
as that of a refractor. Newtonians also need some maintenance in terms of their optics that require being kept clean,
well collimated and preferably stored in a dry environment. Collimation of a Newtonian telescope is not difficult but is
still another skill you will need to acquire.
Newtonians are preferred for deep sky observation where contrast is not as important and their lower prices allow for
larger apertures.
Catadioptric designs like the Maksutov and ACF from companies like Meade Instruments use mirrors, lenses and
corrector lenses/plates to produce compact (folded) and easy to maintain telescopes. Image quality can be very good,
approaching that of high quality APO refractors for top of the range catadioptrics. However, a high quality APO refractor
will consistently produce sharper images than the best catadioptric instruments at a similar aperture but not price.
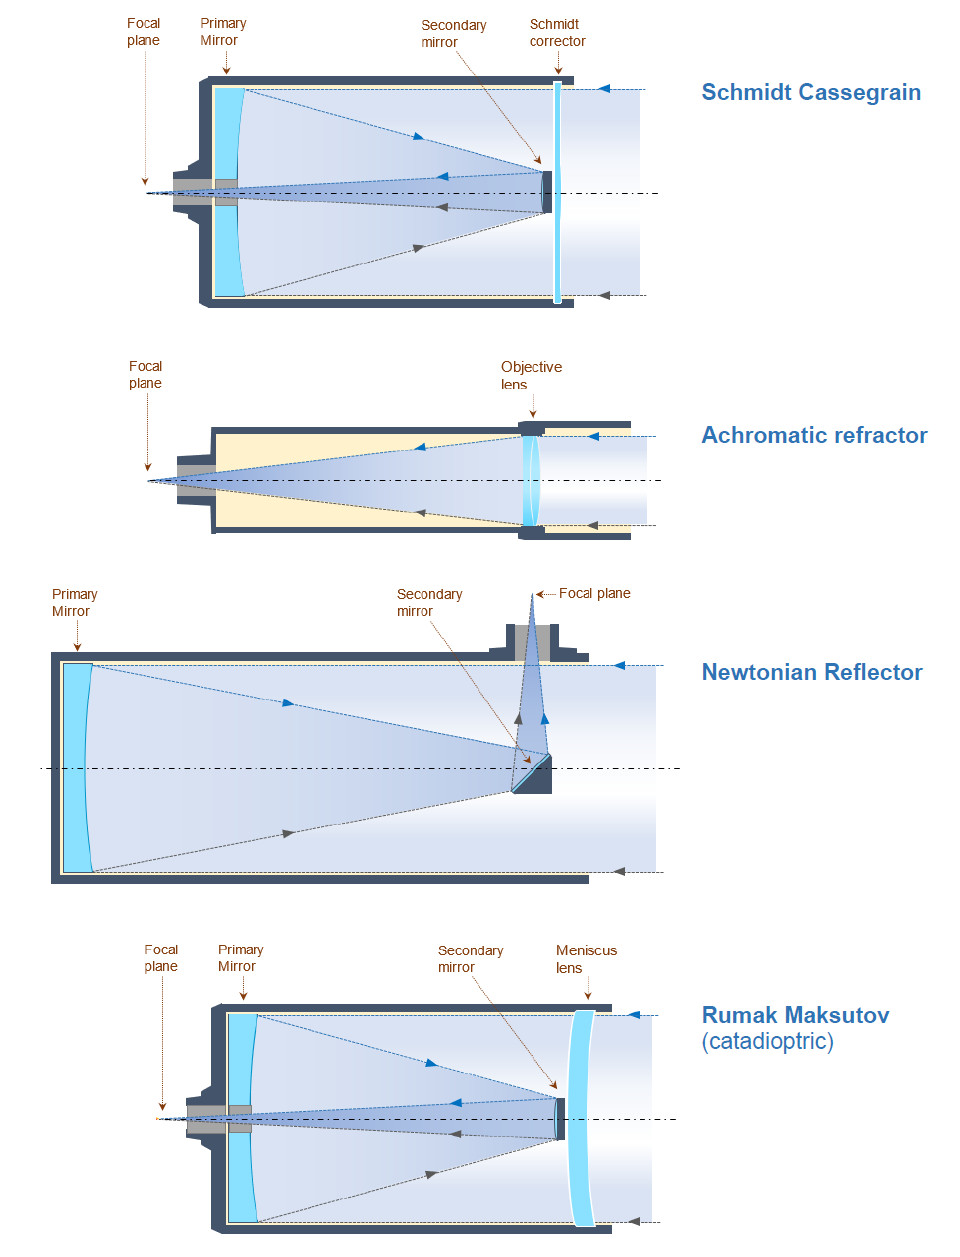
Telescope optical designs.
The different designs outlined above and presented later in this document have their strong and weak points that relate to instrument design, transportability, setting-up, maintenance, ease of use, optical quality and price. Such factors are key in choosing the correct instrument and should affect your final choice.
The large number of interlinked factors tends to sometimes delay a purchasing decision indefinitely as potential buyers find themselves in a “paralysis by analysis” situation so it is worth keeping this in mind. This document will help you to reach a decision by bringing to your attention the most suitable scopes for your needs.
What will I see?
It is worth being aware that your new starter telescope will not produce the high-quality images that are printed in the pages of astronomy magazines with the possible exception of the Moon. Deep sky objects will not appear in colour and while planets like Jupiter may show colour, details will be subtle but visible.
You will be able to see the rings of Saturn and the Cassini division, the belts of Jupiter and the Red Spot. But do not let this put you off. The thrill of seeing Jupiter for the first time will take you aback. The rings of Saturn will make you to want to stay up all night, exploring the moon will keep you hooked for years and viewing your first deep sky object will open your horizons in ways unimaginable.
Common characteristics
There are two common characteristics that all optical designs share apart from the quality of the optic surfaces and materials used, aperture and focal ratio.
Aperture
Aperture determines the amount of light that enters your telescope, the more light that enters your telescope the more you can see.
The amount of light entering the telescope is determined by the aperture or diameter of the objective lens or main mirror. The amount of light gathering ratio for a telescope is calculated by the following formula:
Light gathering ratio = aperture * aperture
For example, a 4 inches aperture telescope, Light Gathering Ratio = 4 * 4 = 16
Aperture
(inches) |
Aperture
(mm) |
Light Gathering Ratio |
| 2 |
51 |
4 |
| 3 |
76 |
6 |
| 4 |
102 |
16 |
| 6 |
152 |
36 |
| 8 |
204 |
64 |
| 10 |
256 |
100 |
| 12 |
307 |
144 |
Therefore, an 8 inch telescope has 4 times the light gathering capability of a 4 inch instrument. In other words, as aperture doubles the ability of a telescope to gather light quadruples. The main benefit of collecting more light with larger-aperture telescopes is that fainter stars, nebulae, and galaxies can be observed.
Dawes limit
Aperture is also important as it can increase detail in an image. The amount of detail that can possibly be seen with a particular aperture (size) telescope is determined by the Dawes Limit.
Through a telescope and under very high magnifications stars no longer appear to be single points. Instead, they appear as tiny disks of light surrounded by a number of faint rings.
As two stars get closerf to each other, it becomes increasingly difficult to tell them apart. And at a certain point, it is impossible to separate the two as they will appear as a single star.
Aperture
(inches) |
Dawes Limit
(arc-secs) |
Magnification
(times x) |
| 2 |
2.28 |
60 – 120 |
| 3 |
1.52 |
90 – 180 |
| 4 |
1.14 |
120 – 240 |
| 6 |
0.76 |
180 – 360 |
| 8 |
0.57 |
240 – 480 |
| 10 |
0.456 |
300 – 600 |
| 12 |
0.38 |
360 – 720 |
The Dawes Limit determines the minimum distance two neighbouring stars can be near to each other while still being viewed as two individual sources of light. Telescopes of larger apertures will perform increasingly better and resolve stars that are even closer to each other. In other words, the amount of detail seen with a telescope increases as the size of the lens or main mirror increases. Larger scopes have lower Dawes Limit values. The Dawes limit can be calculated by the following formula:
Dawes Limit = 4.56 / aperture
thus the Dawes Limit for a 4 inch telescope = 4.56 / 4 = 1.14 arc-seconds.
The Dawes limit is calculated in arc-seconds. An arc-second is a way of measuring the size of objects in the sky, one degree is made of 60 arc-minutes and each arc-minute is made of 60 arc-seconds. The apparent size of the Moon for example is half a degree or 1800 arc-seconds. The measurement is a measurement of apparent rather than actual size. An arc-second for example is roughly equal to the size of smaller sized coin viewed from a distance of a mile.
A 4 inch telescope should be able to separate two tiny sources of light that were a mile away and just over a coin’s diameter apart. Please keep in mind that this is a theoretical limit and in reality this distance is greater and depends on the quality of the optics, collimation and prevailing atmospheric conditions.
Focal ratio
The focal ratio of a telescope unlike its aperture dictates its filed of view. A telescope’s focal ratio is its focal length divided by the aperture. The focal length is the distance
(F) from the main lens or main mirror to where the light converges to a focus, O.
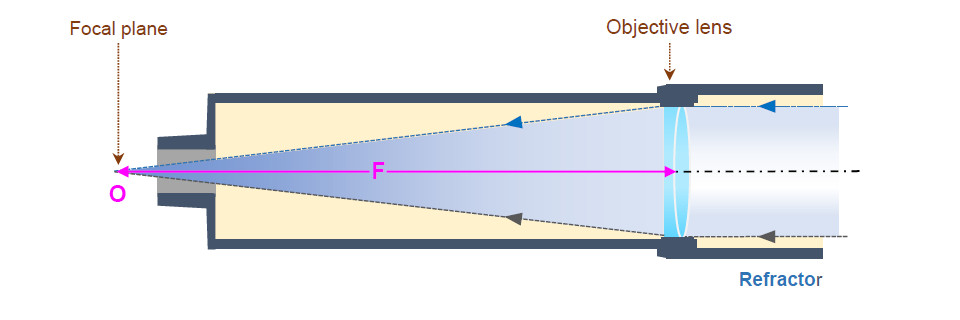
Focal ratio.
For example, if a telescope has a focal length of 500mm and a 100mm aperture, then its focal ratio is f/5 (500/100=5). As a note of interest, telescopes of shorter focal ratios and of comparable optical quality are more expensive to manufacture. As a rule of thumb a higher f/? number will offer better quality optics at the same cost.
Also telescopes of similar design and longer focal ratios are normally physically longer. For example, consider two telescopes of same apertures, say 100mm, with focal ratios of f/8 and f/4 respectively. The telescope with a focal ratio of f/8 will be twice as long as a telescope with an f/4 focal ratio.
For non-folded telescopes like traditional Newtonians, Schmidt Newtonians and refractors the focal length of the objective lens or main mirror will be roughly equal to the length of the telescope. This should help you to deduce the approximate of the telescope by simply knowing its focal length.
For example, the physical length of a traditional 150mm f/5 Newtonian with a focal length of 1,180mm will be around 1,180mm long. When considering a 100mm f/9 refractor with a focal length of 100mm the length of the telescope will be around 900mm. Note this can increase if the refractor has a dew shield, most do.
The focal ratio of a telescope affects viewing in terms of magnification and field of view. The higher the focal ratio f/number the higher the magnification a telescope can achieve but the narrower the field of view will be when using the same eye-piece.
Focal length
The focal length of a telescope can be calculated by multiplying the focal ratio with the telescope’s aperture. For example, an f/5 Newtonian reflector with 150mm of aperture will have a focal length of 750mm (150*5=750).
Magnification
In a telescope, magnification is the number of times an object appears larger to the observer when compared to what the observer can see with the naked eye. There is no theoretical limit to the amount of magnification possible in a telescope, but practical magnification is limited by the optical system and is normally around 30-40 times for entry level telescopes, and up to 60 times per inch of aperture for high quality refractors. Experienced observers using high quality telescopes may push this figure even higher under favourable conditions.
In general, high street store, so called ‘professional’, telescopes will provide around x15 magnification per inch of aperture, regardless of the claims on the box. Please keep in mind that the maximum useful magnification from a suburban yard using any telescope will be around x30 – x35 per inch of aperture, this is due to light pollution (sodium lights in particular), airborne dust, thermal currents and other environmental factors. Expect higher magnification from dark sites.
For a standard SCT expect around 30x magnification per inch of aperture, a 40x magnification per inch for an up-to-date design like the one incorporated in the Meade ACF telescopes or 60x per inch for a triplet APO refactors like the Meade Series 6000 triplet apochromatic refractors.
Eye-pieces and magnification
The actual magnification capability of a telescope will vary depending on the eyepiece attached to the telescope. Magnification can be changed by simply exchanging eyepieces.

Eyepieces and maginification.
Magnification depends on two factors. The focal length of the telescope and the focal length of the eyepiece used. To calculate the magnifying power an eyepiece gives, simply divide the focal length of the eyepiece into the focal length of the telescope.
Magnification = telescope’s focal length / eyepiece’s focal length = F/f
For example, a telescope with a focal length of 1000mm and an eyepiece with a focal length of 5mm will magnify its target 200 times (1000/5=200).
Field of view
The field of view is the portion of the sky that is visible through the telescope and depends on the focal ratio of the telescope. In general, higher magnifications result in smaller fields of view.
Short focal ratios (f/4) with wide fields of view greatly favour deep sky viewing, where focal ratios of f/10 and above are better suited for planetary observation. Focal ratios in between these values may be considered appropriate for general use.
It is possible to calculate the field of view of a telescope given a certain eyepiece with the following formula.
Actual Field of View = Eyepiece Apparent Field of View / Magnification
where Magnification = Telescope Focal Length / Eyepiece Focal Length
Consider a telescope with a focal length of 1,000mm and a 40mm eyepiece with a 70 degrees Apparent Field of View.
Magnification = 1,000 / 40 = 25
Actual Field of View = 70 / 25 = 2.8 degrees
Selecting your first telescope
When buying their first telescope many people underestimate the importance of the factors that will make the whole experience more rewarding. In our opinion your first telescope should fulfil one simple condition. It should provide you with every chance to enjoy the night sky without making a large financial commitment. Such a telescope will enable you to decide whether astronomy is the right hobby for you and whether you should invest on an expensive instrument sometime in the future. It will also allow you to learn the basics of astronomy that will help you in choosing that all important second telescope.
Your first telescope should be easy to carry, set up and use. It should be large enough to allow you to enjoy the larger planets of our solar system and their satellites and take you beyond our planets to deep sky to enjoy views of the Andromeda galaxy, the Orion nebula and other bright deep sky objects like most of the Messiers.
Price is an important issue when you buy your first telescope and we believe that such an instrument should cost around £100-£500 depending on your budget. A cheaper instrument is unlikely to impress anyone serious about taking up the hobby of amateur astronomy. A more expensive and possibly larger instrument may discourage you of using your new telescope as it may be difficult to set up and/or use.
Please remember that the best telescope is the one that you use and not the one stored away in your attic under a pile of boxes because it takes nearly an hour to set up.
Once more a simple word of caution; telescopes sold at your local high street store with words on the packaging the include ‘professional’, “500x magnification”, and pictures of the Orion or Horse-head nebula that can only be taken by expensive telescopes with the right imaging and tracking gear should be clearly avoided. These telescopes are not only inadequate but also hugely overpriced for what they have to offer.
Computerised (GOTO) telescopes
GOTO telescopes are very attractive as they can automatically locate and track Celestial objects including planets, the Moon, stars, galaxies and nebulae. Such telescopes come complete and can be used out of the box with an optional power supply, rechargeable Power Station or batteries.
Meade StaNavigator NG, ETX Observer, LX90, LX85 and LX65 series telescopes come with the latest AudioStar computerised handset. The handset features audio files and an internal speaker. This computerized celestial object locating system plugs into the telescope's handset port allowing for quick telescope alignment.
Once aligned with the sky, the AudioStar is ready to take you to any object in the over 30,000 object database. In addition to GOTO and tracking capability the AudioStar offers a wide array of recreational and educational functions such as multiple Guided Tours, digital positional readouts, the ability to link with a PC or tablet using an optional cord/wireless adapter and software.
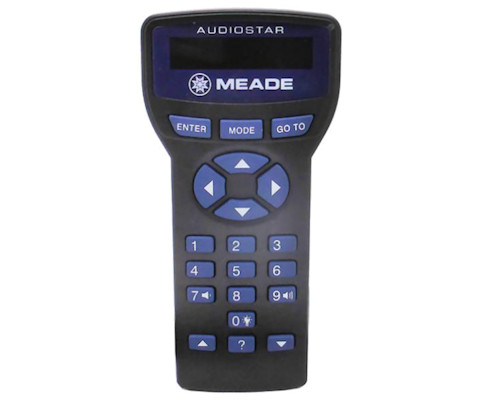
Meade AudioStar handbox controller.
Entry level refractor telescopes
Refractors are among the easiest telescopes to use. They do not require maintenance apart from cleaning the telescope with a soft cloth while avoiding the lenses that are better cleaned at very rare occasions with compressed ‘photographic’ air or specialised lens cleaners available at your local astronomy or camera shop.
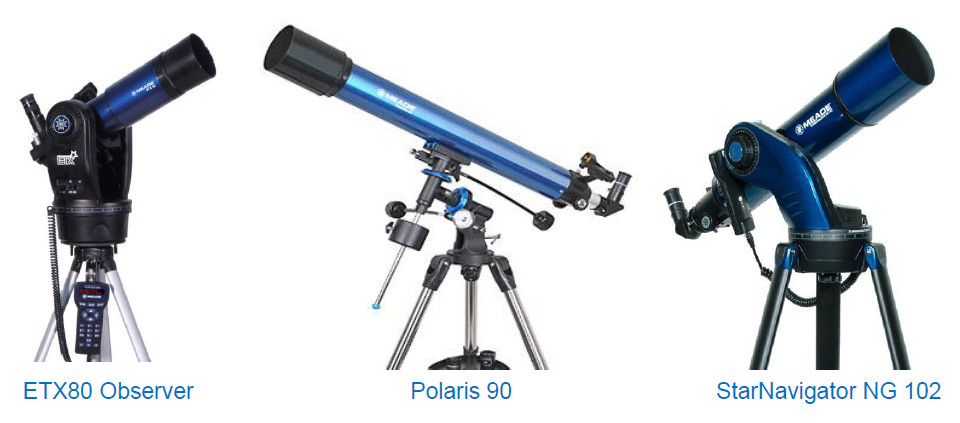
Entry level refractor telescopes.
While the last decision is yours, in our opinion your first telescope should be a refractor or a catadioptric,
especially if you are interested in the Moon and planets. Refractors are easy to use, require no maintenance and
can be affordable. Good and affordable entry level refractors include the Meade Polaris 90 manual telescope,
the StarNavigator NG 102 and Meade ETX80 Observer GOTO telescopes. The StaNavigator NG 102 and Polarirs 90 are better
suited for Lunar and planetary work where the ETX80 is better suited for wide filed work and can also be used
for terrestrial viewing out of the box.
Finally, the ETX80 Observer telescope can be set up on a tabletop doing away with the tripod. In addition, this
telescope incorporates a built-in flip mirror that allows you to have a camera and eyepiece attached to the
telescope at the same time allowing you to choose between the two at the flip of a switch.
Entry level reflector telescopes
Newtonian telescopes are more affordable when compared to a refractor or catadioptric of similar aperture. Image quality is not as good as that of a
refractor or catadioptric and generally produce images of lower contrast.
Reflectors need maintenance in terms of their optics that require being collimated every so often. Badly collimated Newtonians produce
bad quality images. Collimation can be assisted by small affordable tools like a Cheshire eyepiece or laser collimator.
Reflectors do not suffer from chromatic aberrations like refractors. This is because light is reflected off a mirror surface and does not pass through a
lens. However, they suffer from coma. Stars at the edge of the field will look more like very short lines rather than points. The lower (faster) the
focal ratio (i.e. f/4-f/5), the more coma that will be seen closer the edge of the field of view. Coma is noticeable at focal ratios below f/6 and especially
under f/5.
However, in all cases the centre of the viewable field will remain comma free. Coma reducers can be used to effectively reduce coma to near
the edge of the field but these are expensive for a starter telescope.
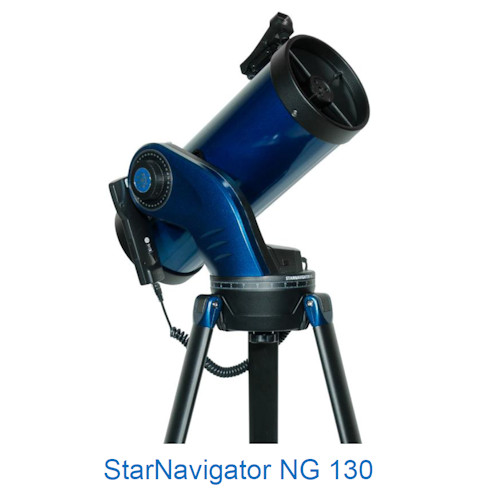
Entry level reflector telescope.
Faster Newtonians (i.e., f/5) are preferred for deep sky viewing where high contrast is not as important, coma is not as noticeable and their lower prices allow for the larger apertures demanded for deep sky observation. If
deep sky is what you want to do the Meade StarNavigator NG 130 Newtonian reflector would be an ideal fully featured instrument.
Advanced entry level catadioptrics
Catadioptric designs like the Maksutov use mirrors and a full aperture corrector lens to produce compact and easy to maintain telescopes.
Image quality is high and the optics are protected. One great advantage of Maksutovs is their small size and good planetary and Lunar
performance when compared to Newtonian reflectors or achromatic refractors.
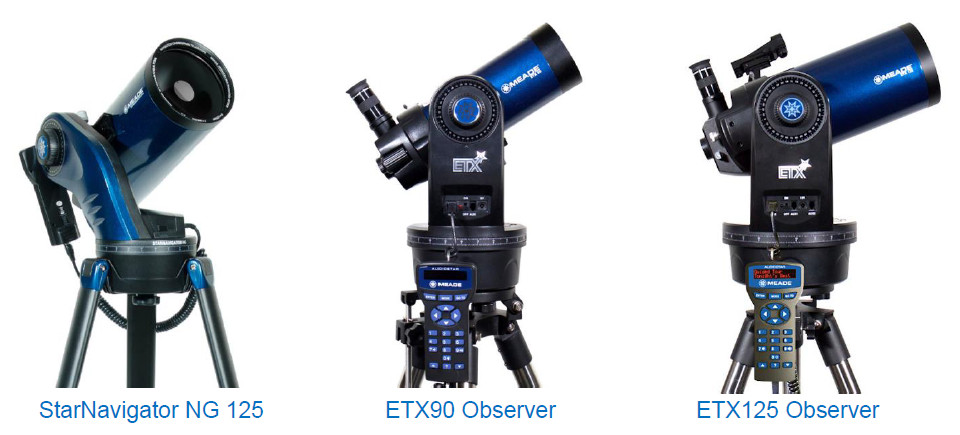
Advanced entry level catadioptric telescopes.
On the other hand, these telescopes need time to ‘cool down’ before they can deliver nice steady images. This
requires taking the telescope out of a warm house and leaving it outside for a period of around 30 minutes
depending on their size. Traditional Newtonians and particularly refractors require approximately half the
cooling time.
A good starting aperture for such a scope would be 90mm and focal ratio would be around f12 or higher. A
125mm catadioptric would be a great instrument as a ‘larger’ aperture easy to carry and setup telescope
requiring minimum maintenance. Such a scope will perform very well on the planets and the Moon and will
also be useful as a deep sky telescope when it comes to deep sky objects of small apparent size.
The ETX90 and ETX 125 Observer come with tripod that incorporates an equatorial wedge. This enables the
telescope to be set in equatorial position, required for prolonged exposures and deep sky imaging. In addition,
ETX90 and ETX 125 Observer telescopes can be set up on a tabletop doing away with the tripod.
Finally, the ETX90 and ETX 125 Observer telescopes incorporate a built-in flip mirror that allows you to have
a camera and eyepiece attached to the telescope at the same time allowing you to choose between the two at
the flip of a switch.
Accessories
You will probably need an optional 1.25” Moon filter to observe the Moon and would benefit
from a mains power supply if you regularly used the StarNavigator NG or ETX Observer
telescopes since running them on batteries would prove expensive in the long term.
Other accessories would include eyepieces and/or a camera could be added at a later stage.
Video cameras like the Meade LPI-G will allow you real-time views of the Moon, the planets
and the stars adding to the enjoyment. Alternatively, you could connect a DSLR camera to
any of these telescopes using the appropriate adapters.
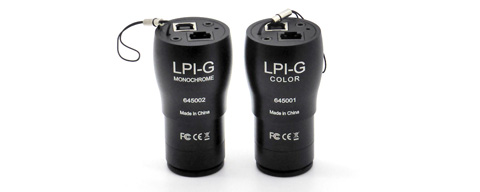
Meade LPI-G lunar and planetary cameras.
Connectivity
The Meade StarNavigator NG and ETX Observer series telescopes offer reliable and powerful GOTO capabilities representing unmatched value.

Remote telescope control from smartphone or tablet.
These telescopes can be remotely controlled from a tablet with the optional Meade STELLA wireless adapter,
Meade #505 cable and SkySafari 6 Plus/Pro. These items are not included with your telescope and must be
purchased separately.

Remote telescope control from a computer.
Alternatively, you could control your Meade StarNavigator NG and ETX Observer series telescope from a PC
for which you would require the Meade Software Suite or favourite digital planetarium in conjunction with a
high quality USB to RS232 adapter and Meade #505 cable. These items are not included and must be purchased separately.
Conclusion
A 90mm or 100m f8-f10 refractor is a great scope for planetary and moon observation and will do well even
when pointed to some star clusters, galaxies and nebulae despite the relatively small aperture.
If deep sky appeals more to you a Newtonian reflector will be a good choice. Remember that Newtonians
require some maintenance.
The Maksutovs are very transportable and better suited for planetary and Lunar observation but larger apertures
can also be used for some deep sky work. Remember that they do take some time to cool down but like
refractors do not require maintenance.
More advanced starter telescopes are also available at higher prices. The main advantage of such alternatives
is that their more expensive versions are computerised and can automatically locate and track deep sky objects
for you. In addition, they can be connected to a PC or tablet and so they can be remotely controlled.
Related topics:
article, StarNavigator, ETX Observer, Polaris


