Introduction
This article will show you how to get the most out of your telescope when visually observing the Moon, planets, comets and deep sky objects including galaxies, nebulae and star clusters.
Amateur astronomers will spend much of their time observing the wonders of the night sky through the their telescope’s eyepiece; these comprise of planets, moons, asteroids, meteors, comets and in exceptionally rare cases passing visitors from outside our Solar System like Oumuamua and 2I/Borisov, among the first known interstellar bodies detected but unfortunately beyond the capabilities of an amateur’s instrument and by now well out of range.
Beyond the confines of our Solar System the amateur astronomer can point their telescope to a huge array of deep sky objects like nebulae, galaxies, star clusters and stars that form the known constellations.
We will be reviewing the most popular telescope designs used for observational purposes before venturing into other aspects i.e., judging atmospheric conditions, factors affecting observation, observing techniques, equipment, the effects of condensation, methods of navigating the night sky and finally safety.
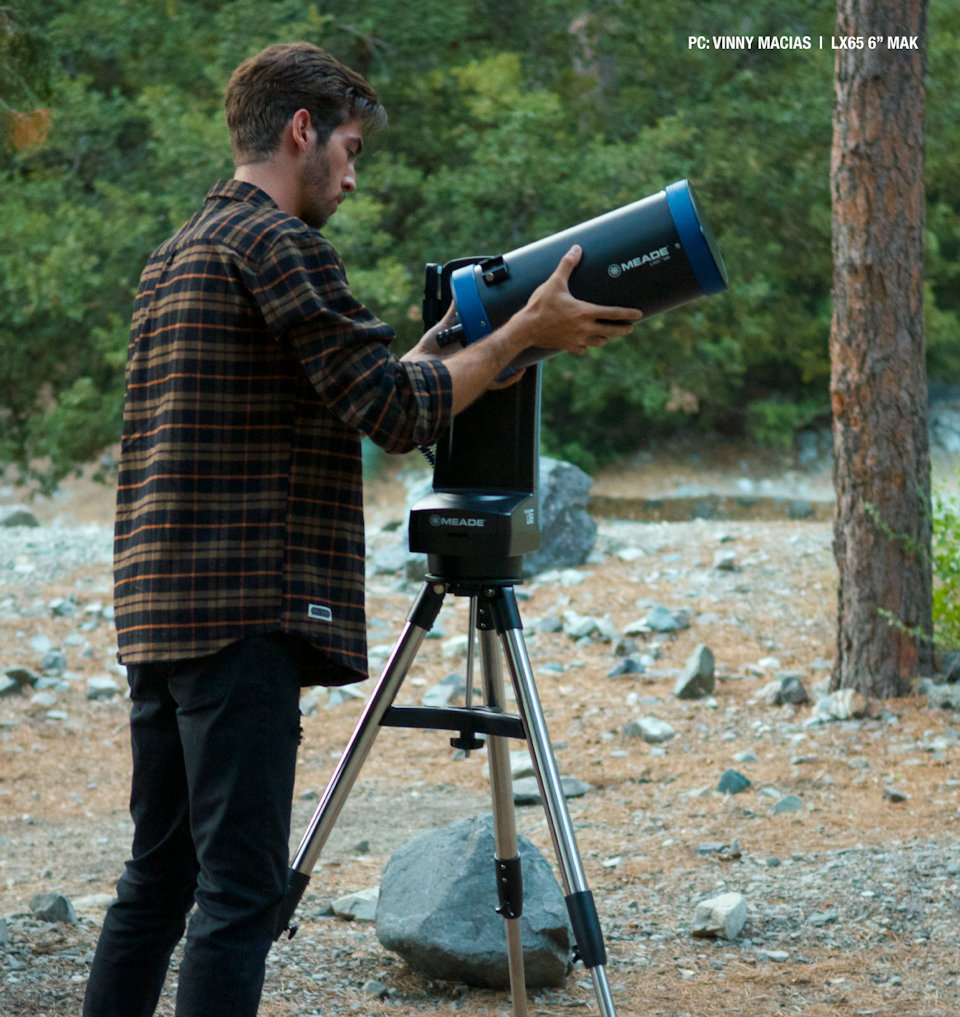
Visual observation with the LX65 5" Mak.
Understanding your telescope
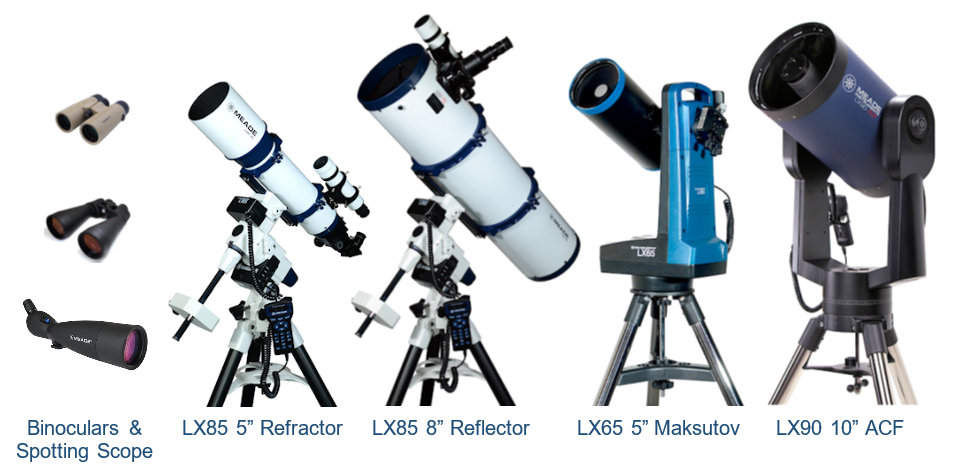
Depending on the type of objects you are interested observing, you would benefit by choosing a more suitable telescope for the job. Binoculars and spotting scopes can still be used to a reasonable extend and will also be discussed.
Binoculars
Binoculars are ideal for observing the constellations, and some of the brighter Deep Sky Objects (DSO). The planets will look like tiny disks but you will still be able to make out Saturn’s unique shape and observe the Jovian Moons. Higher magnification binoculars will resolve some of the Moon’s larger craters and features. Binoculars are easy to carry and use and offer a wide field of view, typically 5 to 7 degrees but this can vary.
Binoculars of 40mm-50mm aperture are very easy to handle but 70mm binoculars are much more difficult to keep steady and you may prefer to use them on a photographic type tripod. For binoculars above 70mm in aperture, you would definitely need a tripod to use them.
Spotting scopes
Spotting scopes are excellent all-round instruments designed primarily for terrestrial observation but can also be used for astronomical work offering relatively wide fields of view, narrower than that of a binocular but wider than that of an astronomical telescope. Unlike binoculars that offer low magnifications, spotting scopes offer low to medium magnifications e.g., 20x - 80x depending on the model.
They typically come with a ZOOM eyepiece and will require a tripod to use. They will perform better than binoculars on the Moon and planets revealing more detail at higher magnifications and are also well suited for deep sky viewing.
Spotting scopes with the eyepiece at 45-degrees are much better suited for astronomy since they are more comfortable to use compared to the straight versions of the same. They come in various apertures but 80mm and 100mm aperture scopes would be ideal.
Refractor telescopes
Refractors are general purpose instruments offering wide to medium fields of view but unwieldy at apertures over 6-inch. High quality 5-iinch to 6-inch apochromatic (APO) refractors, would typically give you the best views of the planets and the Moon but the relatively small apertures of these instruments do not make them ideal for observing fainter deep sky objects.
The same would apply to achromatic refractors but expect magnifications for these instruments to be around half that of an APO refractor. In addition, achromatic refractors suffer from a degree chromatic aberration that ultimately reduces contrast, particularly visible on the Moon and planets.
Newtonian & Dobsonian reflector telescopes
Newtonian and Dobsonian reflector telescopes are general purpose instruments offering wide to medium fields of view. They are bulky and need a heavy mount. They are difficult to handle and use at apertures above 10-inch but their relatively low cost in terms of aperture make them ideal for deep sky observation. They do require some care in terms of keeping the optics clean and well collimated.
Gregorian Maksutov telescopes
These telescopes are ideal for Lunar and planetary observation but become bulky and rather heavy at over 7-inch apertures. They are still well suited for observing small apparent size DSOs.
Advanced Coma Free (ACF)
Meade’s ACF telescopes come in various sizes from the very transportable 6-inch to the large 16-inch. They offer fully coma corrected optics and come in F/8 and F/10 focal lengths making them ideal for general observation and imaging. They start becoming heavy at apertures 10-inch and above when considering a complete telescope but the optical tubes are reasonably manageable up to 12-inch in aperture.
Judging atmospheric conditions
The darkest skies are not always best for observation as the Milky Way and stars can overwhelm the sky even casting weak shadows onto the ground. The ideal site would still need to be free of light pollution with minimal dust in the air, low levels of condensation, minimal atmospheric turbulence and will benefit from being located at higher altitudes.
A bright horizon suggests high levels of light pollution. If the sky glow at the horizon appears white, expect high levels of condensation but low levels of air-borne dust. If the horizon has a yellow glow this would suggest high levels of air-borne dust and possibly levels of condensation.
Looking up, observe the stars with your eyes. If the stars twinkle slowly this would suggest that turbulence at the higher levels of the atmosphere is minimal which is desirable. Otherwise, fast twinkling star suggest atmospheric turbulence. Note that planets do not twinkle like stars do.
You can also test for turbulence though your telescope. Once the telescope has cooled down, point it to a bright star like Polaris if you use a manually controlled telescope or even better at a bright star near the zenith. Place the star in the centre of the field of view and use a high-power eyepiece to focus on it. Then come slightly out of focus until the star looks like a number of concentric circles. If the image of the defocused star remains uniform and steady, turbulence is negligible.
To summarise, the ideal site would be dark and at a higher altitude which benefits from a thinner atmosphere and typically lower pollution levels. A dark horizon would suggest low levels of air-borne dust and also low levels of condensation in the air. Finally, slow twinkling stars at zenith suggest minimal atmospheric turbulence.
Factors affecting visual observation
Apart from location and the prevailing atmospheric conditions there are other factors that will have an adverse effect on the quality of the image viewed through the telescope that are worth being aware of. Unlike atmospheric conditions there are ways to mitigate their effects.
Your immediate surroundings
It is important to be aware of your surroundings. Place your telescope where no stray light can reach it, directly or indirectly. For example, light that has bounced off a wall can still enter the telescope at an angle and eventually reach the eyepiece. Stray incoming light can interfere and reduce image quality. A dew shield will reduce the chances of this happening.
It is preferable standing on grass than say on a concrete slab since concrete releases heat during the night that has been stored in its mass throughout the day. This affects especially open design telescope like a Newtonian/Dobsonian reflector, Ritchey Chretien, or so-called reduced aperture Maksutov telescopes that do not incorporate a front lens making these designs suspectable to tube currents. An electric fan situated at the bottom of the optical tube running at low speed and sucking air out of the telescope would help to reduce turbulence in open telescope designs streamlining airflow to a degree.
Also, be aware that if your line of sight passes just over a warm house, heat released form the house will rise and interfere with the image.
Your personal state
It is important to dress appropriately, especially if you are observing in the cold. In cold weather, loose but warm clothes, appropriate footwear, gloves and a warm hat are necessary. Alcohol, while comforting will not have the desired effect and will also adversely affect your vision.
Having had hot food earlier and warm drinks available during an observing session will help making the experience a pleasant one and equally rewarding.
Using a chair that you can adjust its height to accommodate the position of the eyepiece will add to the enjoyment since you will be able to observe while remaining seated and relaxed rather than bend over the eyepiece to an uncomfortable position while trying to keep still, sometimes for long periods.
Dark adaption
Human eye light sensitivity increases dramatically when the eye is starved of light. It typically takes 30 minutes in a dark environment for the eye to fully adapt and reach maximum sensitivity. Dark adaption can be easily reversed so staring at a bright light for say a fraction second will roll back your eyes’ light sensitivity by several minutes.
Due to the eye’s physiological nature, using a red LED torch at its lowest usable setting will affect your dark adaption the least.
Using an eye patch to protect the eye you observe with or, covering your eye while using a torch, red or otherwise, will also help to protect your dark adaption.
Observing techniques, tricks & tips
Getting to know your targets
It is advisable to study high quality images of your targets captured by CCD cameras prior to observing them through a telescope. This will greatly help you in identifying these objects but most important will enable you to pick up details otherwise invisible. Such details become suddenly apparent because you simply know where to look and what to look for.
Cooling-down the optics
It is important to let the optics cool down before you start a session. The time it takes varies and depends on the telescope’s optical design, aperture and temperature difference between where the telescope was stored and the atmospheric temperature where it is going to be used. This is not important if you have your telescope set up say an hour prior to a session while being aware that weather conditions may rapidly change.
Typically refactors cool down relatively quickly followed by Newtonian reflectors and catadioptrics and then Maksutov telescopes. Most medium aperture telescopes would have cooled down within around 30 minutes.
Focusing
As temperature can change through the night, sometimes dramatically, it can affect the telescope by slightly moving the focal plane bringing you out of sharp focus. It is a good idea that every time you look through the eyepiece to evaluate the sharpness of what you are looking at and if you think there is a need to refocus, do so.
Averted vision
Averted vision is a technique for viewing faint DSOs that uses peripheral vision and not the centre of your eye. Instead of looking directly at the object, you look a little off to one side, while still concentrating on the object. Objects that were invisible when you looked directly at them could now become visible.
Fatigue
If you feel tired take a break for a few minutes to relax yourself and your eyes. A warm drink could help you hydrate yourself and rebuild some of your energy, especially in cold weather.
Your telescope and gear
Make certain that you are familiar with the operation of your telescope, whether you use a manual or a computerised instrument.
Make a list of the items you will need to take with you if the observing site is away from home.
There is nothing more disappointing than reaching your destination to find out that you are missing a dew shield, power-tank or something else.
Be well organised and use cases for placing accessories like eyepieces and filters so that they are easy to access.
Avoid leaving eyepieces, filters and other accessories on the ground. It is very easy leaving something valuable behind after a long night of observing and it is equally difficult finding it in the dark even if you know it is missing and even if you have a torch in your hand.
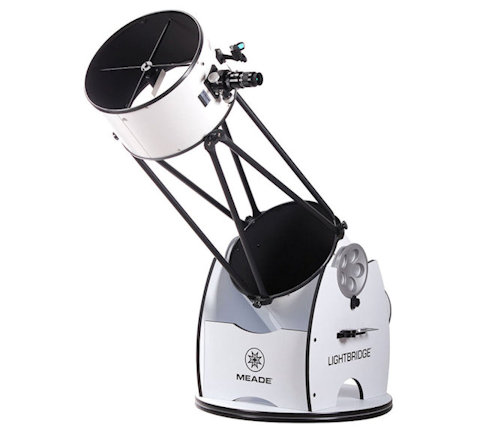
16" LightBridge Dobsonian.
Electric power
If you use any type of motorised telescope, dew heaters or electrical equipment in general, you will need to power them. Typically have more power available than you think you would need.
Cold weather can significantly reduce the capacity of a battery and also its life span or, a session may last longer than you had planned for. If you use battery cells in a cold environment, keep in mind that batteries will run out of power much sooner than you wished for.
It may had been an exceptional night and you definitely wanted to stay for another couple of hours to take advantage of the excellent conditions, only if you had not run out of power.
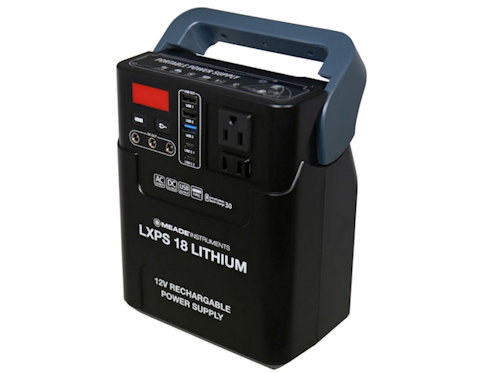
LXPS 18 Power Supply.
Condensation and optical surfaces
In cold weather and when temperature drops rapidly, condensation can build on the telescope’s optics and eyepieces, whether this is a mirror, front corrector plate, lens or eyepiece. As condensation slowly takes over an optical surface image quality will gradually degrade to the point that the telescope becomes unusable. Dew shields and dew heaters can be used to reduce or eliminate the chances off condensation developing on the optical surfaces of a telescope but there are advantages and disadvantages.
A dew shield will prolong the time that will typically take condensation to build on an optical surface under unfavourable conditions by two to three hours. In addition, a dew shield will protect the telescope from stray light entering the optical tube. On the other hand, a dew heater should completely protect the optics from condensation but heating glass also distorts its shape inevitably affecting image quality. It is difficult to come in terms that the precise shape of a large optical surface remains true in terms of its optical prescription when heat is only applied at its periphery. In addition, a reasonable amount of power will be required to power the dew heaters.
Perhaps, the bottom line is that if you can hold back condensation with a dew shield which is likely to be the case for most amateur astronomers, do so. Only use dew heaters if dew shields fail you.
If condensation builds on any optical surface, do not wipe it off as this will most likely smear the glass and possibly scratch the optical surface. Use a hair dryer or similar (set to cold) to remove the condensation or call it a day and bring the telescope indoors for the condensation to dissipate by itself. Do not put the dust caps on before the condensation dissipates.
To protect the eyepieces from condensation, you could keep them in a closed case or inside your pockets. Dew heaters are available for eyepieces but you may need to negotiate as many wires in the dark as you have eyepieces.
Navigating the night sky
Star maps
Under excellent conditions over 2,000 stars can be seen with the unaided eye but only a few hundred of these are prominent enough to be useful in navigating the night sky, these are normally included in amateur sky maps and digital planetarium applications that will run on a PC, MAC, Linux, iOS/Android smart phone or tablet. Such software applications include SkySafari and Stellarium.
Some stars will show colour that is useful in identifying them. For example, Antares, Betelgeuse and Aldebaran are orange/red where Vega, Rigel and Spica appear as blue/white. Stars that form easily recognisable patterns have been given names and are referred to as constellations. Of these, the brightest stars act as beacons and can be used to effectively navigate the night sky during the different months of the year. To that extent stars can be particularly useful in locating other interesting objects nearby.
Planets and their satellites, comets, asteroids and meteors move independent of the night sky background and at comparatively high apparent speeds. They are therefore very difficult or impossible to reference to any star. However, planets like Jupiter, Saturn, Venus and Mars as well as the Moon are easy to spot with the unaided eye and in the case of the larger planets and especially the Moon, even medium size binoculars will reveal a limited degree of detail. Spotting a planet is not difficult since planets, unlike stars, planets do not twinkle.
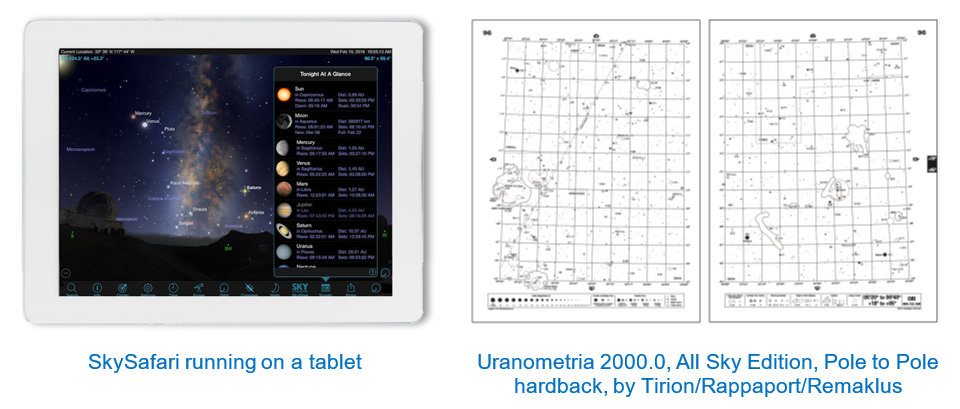
Whether you use a computerised telescope that can automatically slew to a user selected target or say an iPad or a printed star map to help you locate an object, the process is very similar. You will have to identify in advance the objects you want to observe and mark them with pencil if you use printed star maps or make a list of them to use on the night.
Meade computerised GOTO telescopes will in addition recommend suitable objects to view depending on your location, date, time and the type of the telescope you use. These telescopes, will automatically slew, locate and track the object for very long periods. In addition, the same telescopes will offer you the choice for a Guided Tour to suit your needs if this was preferable.
Safety
The Sun
Be aware where you point your telescope, especially when your observing session lasts to the early hours. Make certain that your telescope points away from the Sun and that the dust caps have been fitted. The Sun can damage most telescopes within minutes and one’s eyes within a fraction of a second.
Personal safety
With personal safety in mind, if you observe away from home and possibly at a remote location it is advisable that you do not do so alone. Also make certain that someone knows where you are heading and what your plan is, then do not to deviate from it. Finally take your mobile phone with you and make certain that you have enough petrol in your car.
Related topics:
article, visual observation


